Install to specific collection page
In this article we explain how to install a slider not only statically to all collection pages or templates but also to a specific collection page. After all, the same slider on all collection pages does not always make sense, but sometimes you only need a slider on a specific page.
If you have not yet read the general installation instructions, it is best to read them first.
Install Slider to Theme
The prerequisite for adding the slider to a specific collection page or template is that you use a theme that uses Shopifys Online Store 2.0 or is compatible. This is because Shopify's Online Store 2.0 system allows you to create custom collection templates. So instead of just adding the slider to the default collection template, you can add it to custom templates. If you want to know more about custom templates, first have a look at Shopify's documentation.
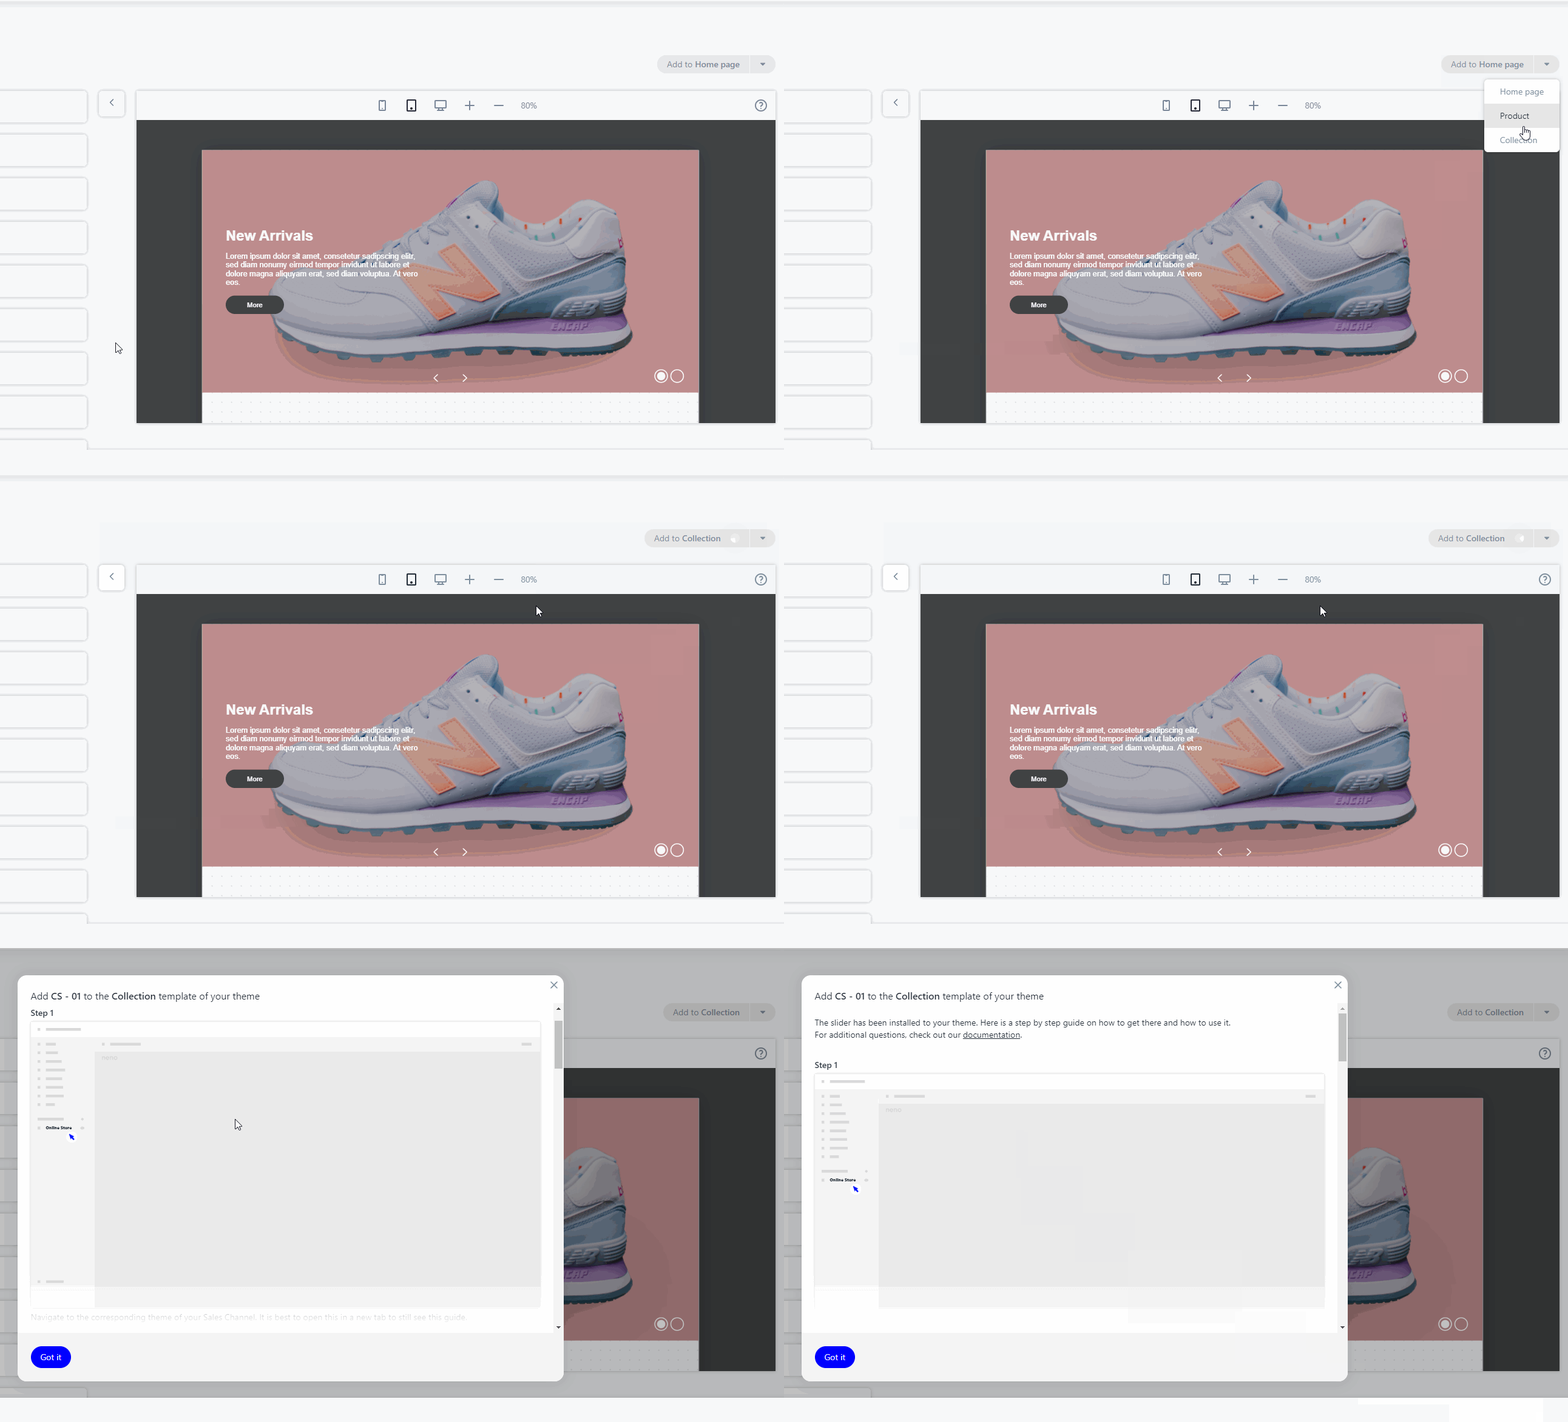
First select the collection template and follow the description in the popup.

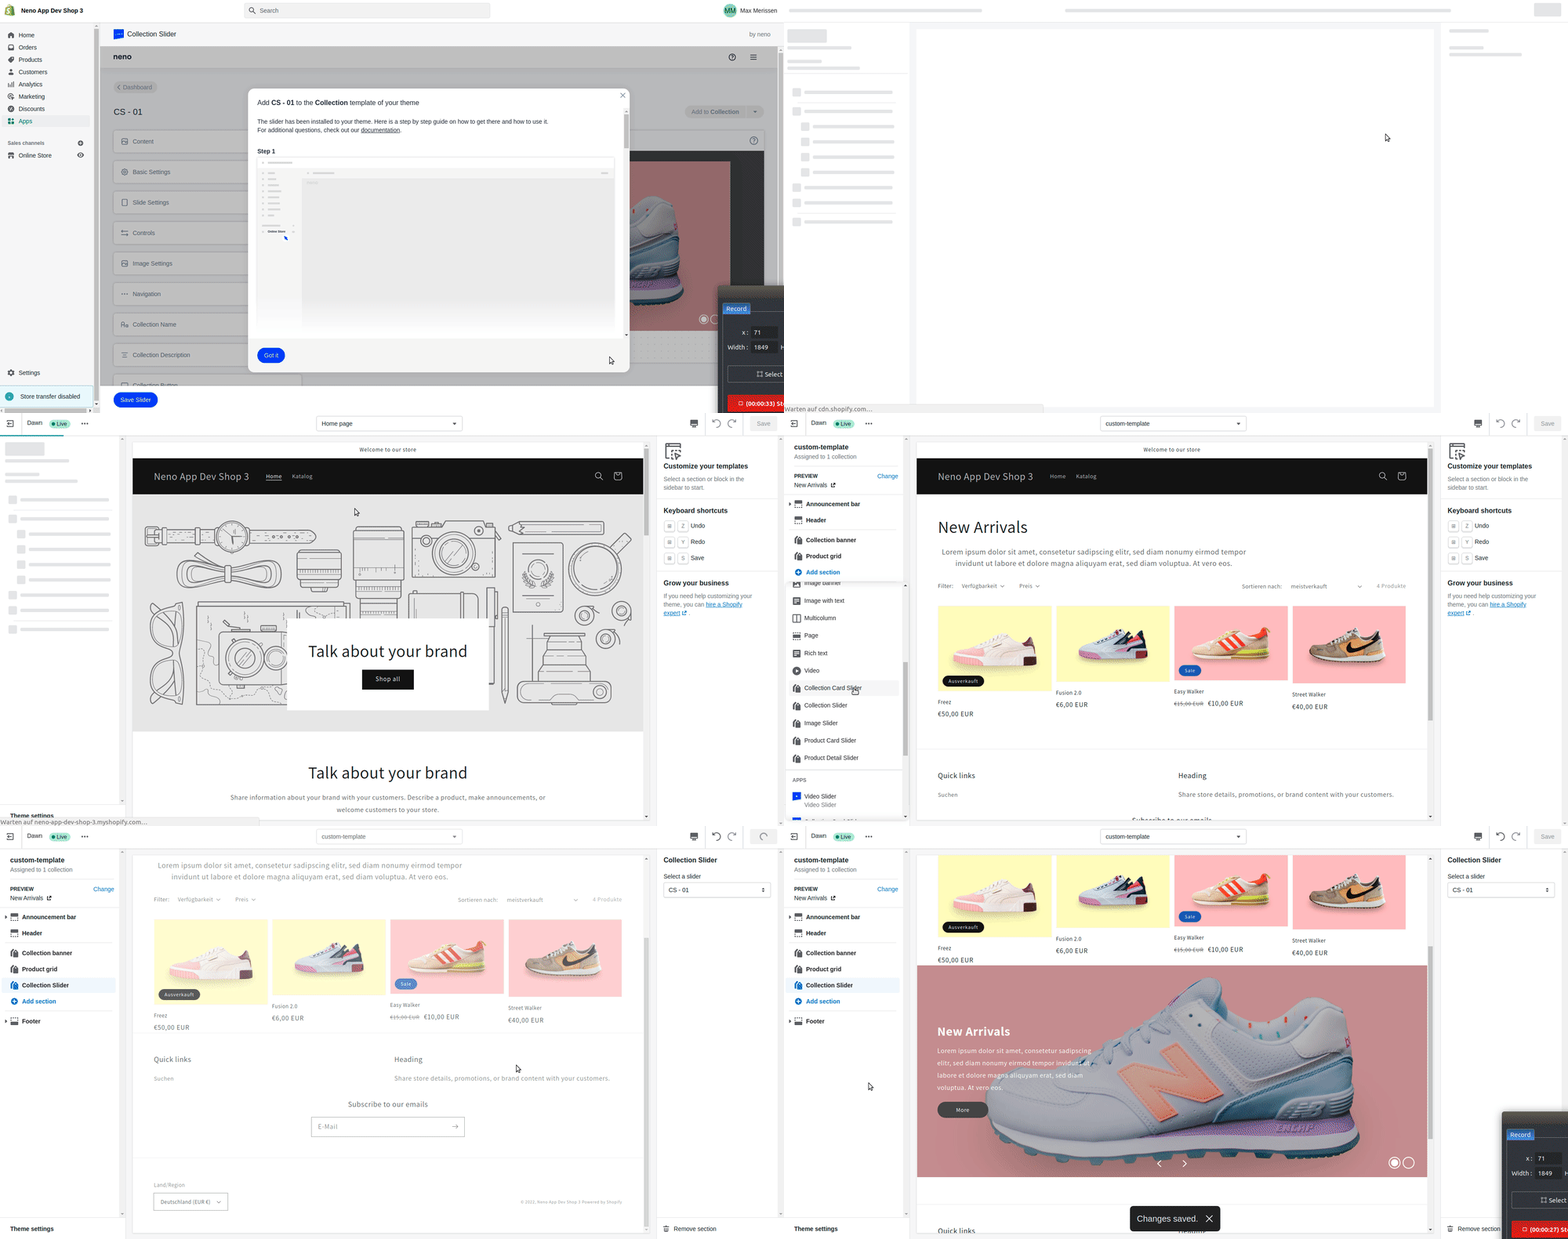
For demonstration purposes we have already created a custom template with the name custom template. Select your store under Sales Channel and open the Shopify Theme Editor using the Customize button. Once you are in the Theme Editor, select your custom template under Collections, in our case the template with the name custom template. Then insert the slider there.

Now the slider is installed in the custom template and is ready for use in your store.