Transfer to storefront
After you have successfully created your Upgrade, we will now show you how to place it within the storefront and present it to your customers. Upgrades can be added to the product page within the storefront. For this purpose, one widget is available which can be placed through the Shopify Theme Editor:
Pop-up (Product page)
Activate and setup the pop-up
To activate the pop-up for the product page, you do not have to select the product template in the Theme Editor as you do for the Bundles widget, for example. With Shopify's app embeds, you can activate and set the pop-up higher-level within the Theme Editor. This activates the pop-up globally for all product pages.

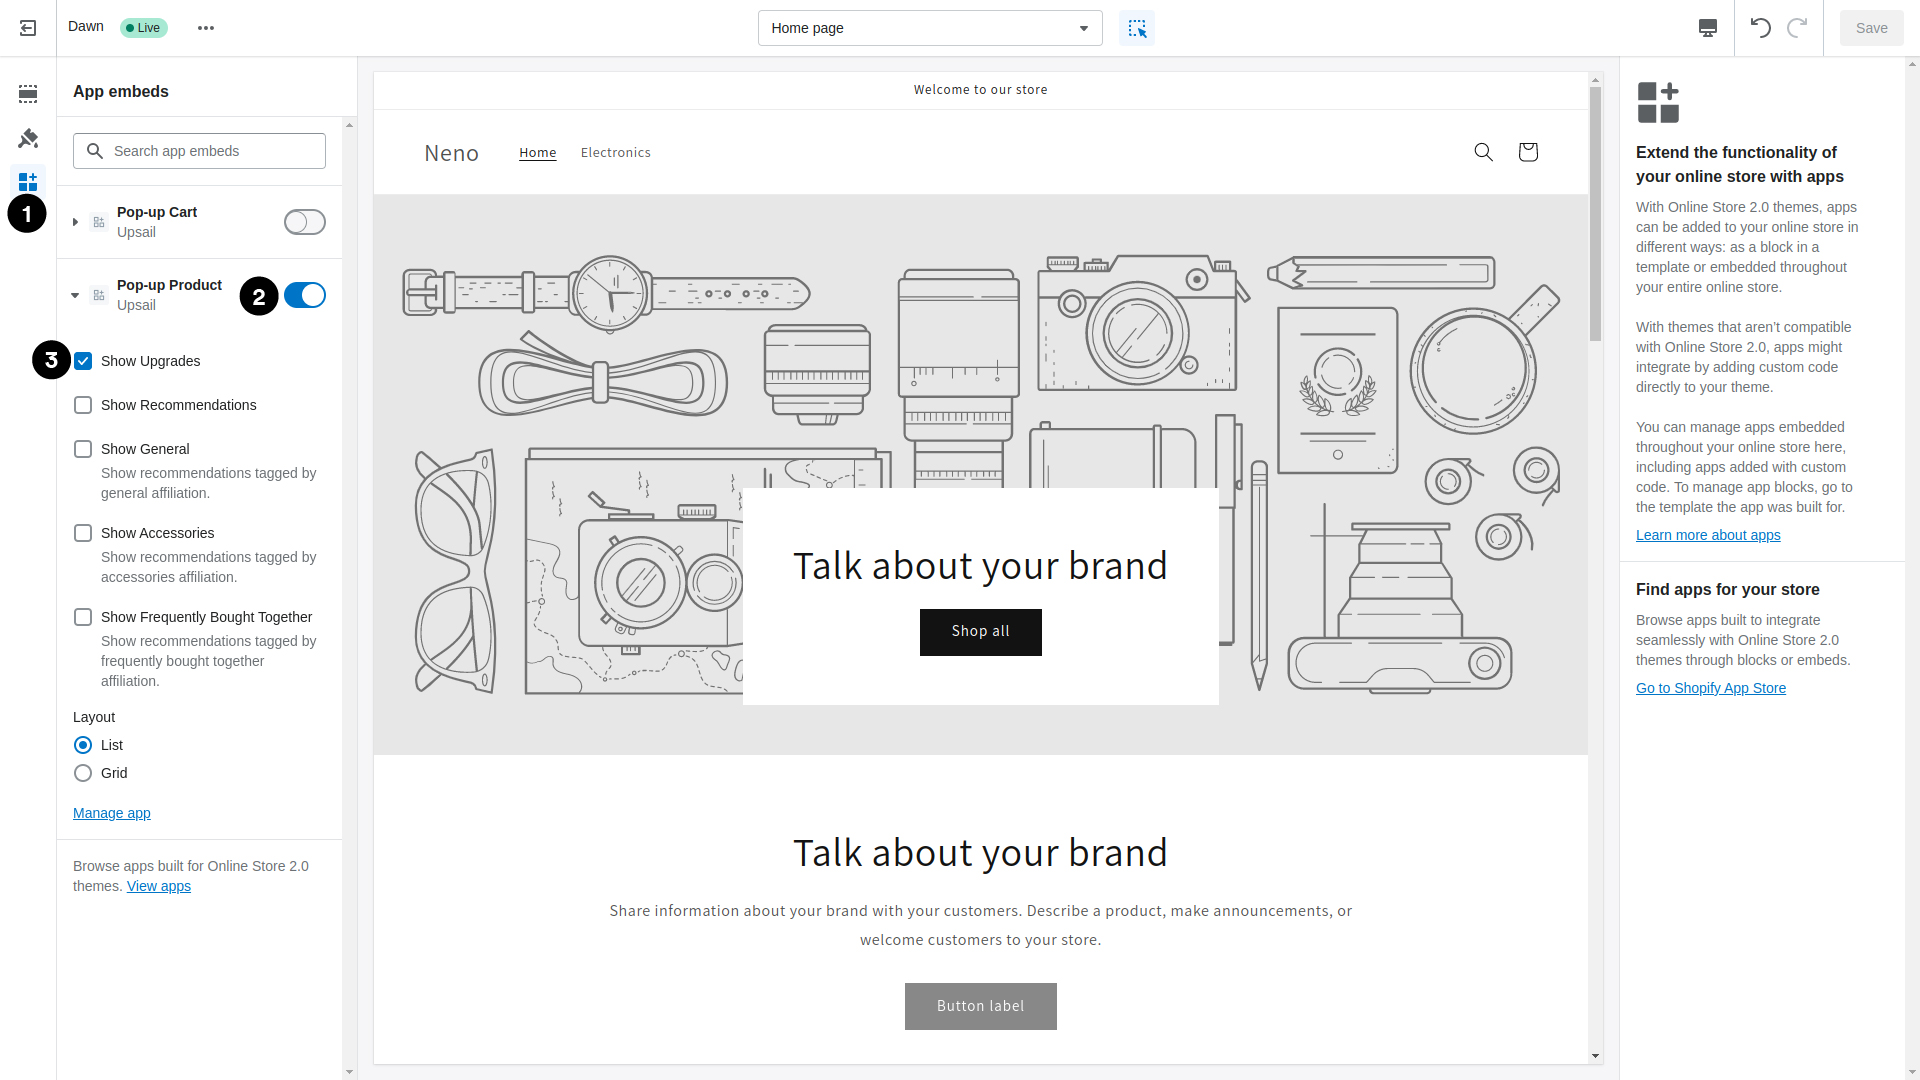
1. Open the app embeds
Open the app embeds within the Theme Editor.
2. Activate the pop-up
Click the toggle button to activate the pop-up.
3. Widget settings
Here you can fill the pop-up with data or products. To activate the corresponding Upgrades in the pop-up, you must activate the Show Upgrades checkbox. Since Recommendations can also be displayed within the pop-up in addition to Upgrades, you will see additional checkboxes for Recommendations here (to learn more about this, see the guide on Recommendations). Additionally, Upgrades and products can be displayed in two different layouts: List and Grid.
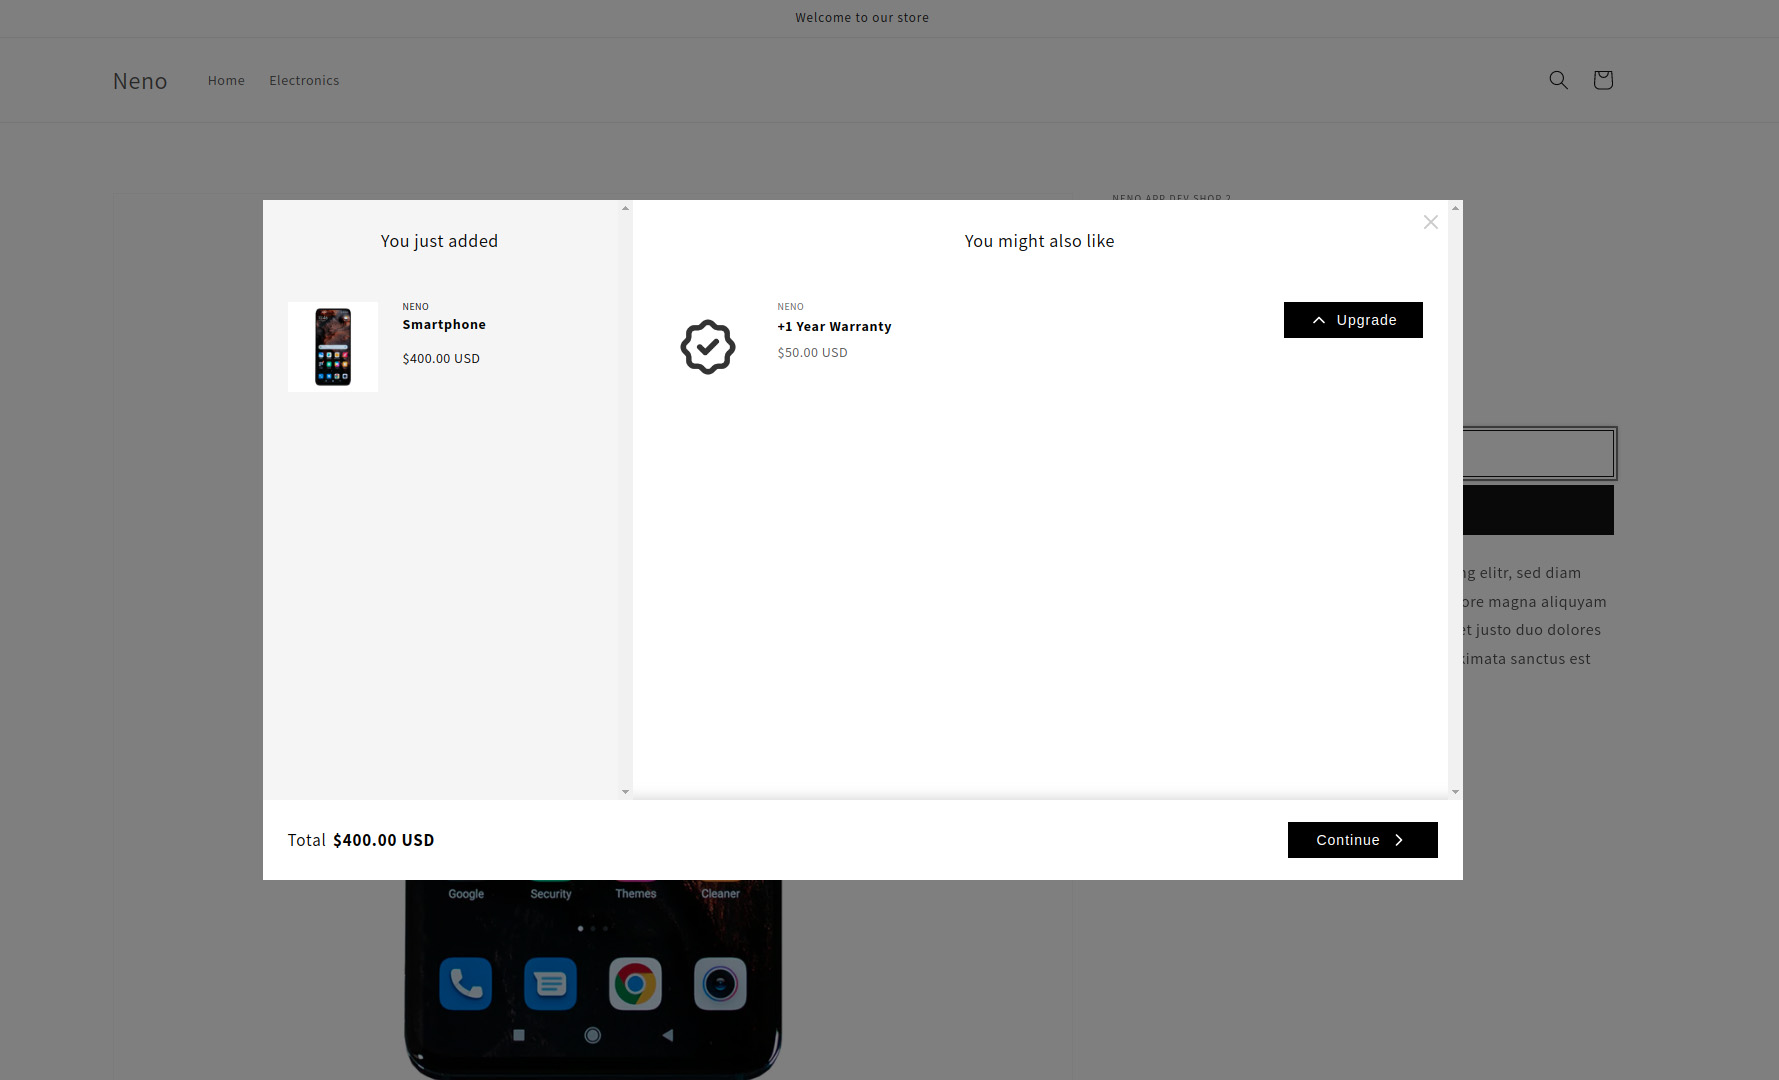
Widget successfully added
Now you have successfully added the Upgrade to the pop-up. Now it is ready to be presented to your customers. To see the result open the corresponding product page in the storefront. Now the pop-up with the Upgrade will be displayed when you click the Add-To-Cart Button. Customers can additionally add the Upgrades within the pop-up and will be redirected to the shopping cart page.

Congratulations you have successfully added your first Upgrade via the pop-up widget to the product page.